
Most tooling cost is locked in before the RFQ ever leaves your desk. Design decisions—where features sit, how tight the tolerances are, how many stations the die needs—determine roughly 80% of the manufacturing cost a stamper will quote back to you. The strategies below focus on the six design levers that move tooling cost the most, with the kind of numbers a stamper or DFM engineer actually looks at.
1. Cluster Features for Material Utilization, Not Just Part Shape
Strip layout is a direct function of feature placement. A bracket with features clustered on one side can nest tightly on the coil; the same part with features scattered forces wider stock and more scrap between hits. In one documented comparison, a 4×6-inch 304 stainless bracket at 0.125 inch thickness achieved 65% material utilization with good feature placement and only 45% with poor placement—on a 50,000-piece run, that gap translated to 7,500 extra pounds of material, or $13,500 at $1.80/lb. Raw material routinely reaches 75% of total stamping cost, so layout choices are not cosmetic—they are the single largest recurring cost driver. Align features with part geometry, and specify grain direction early so the tool engineer can nest without forcing a wider strip.
2. Choose Bend Radii the Die Can Live With
Tighter radii do not just risk cracking—they shorten die life and multiply springback adjustments. A die making 50,000 parts with 0.125-inch radii may produce 200,000 parts with 0.250-inch radii before refurbishment. The practical rule: minimum inside radius at least 1.5× material thickness for most metals; hardened stainless needs 3:1 or more. If the design can accept a looser radius, tooling becomes cheaper, more durable, and easier to maintain—without changing part function.
3. Control Hole Size and Edge Proximity
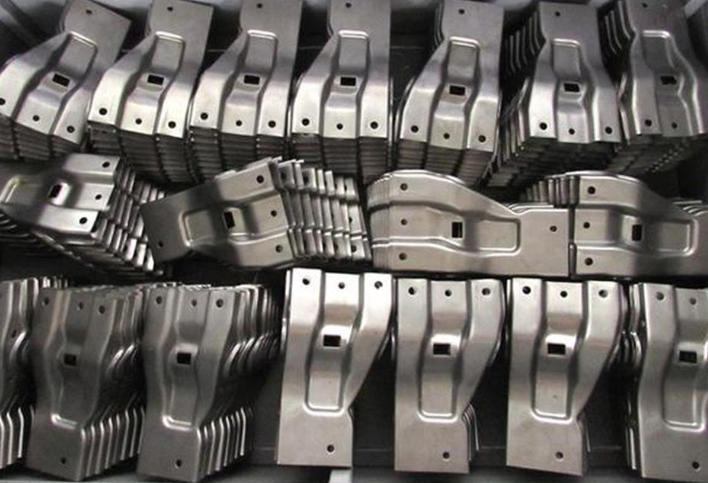
A punch that is too small for the material thickness will break in production, not in the die shop. Minimum hole diameter should be at least 1× material thickness, preferably 1.5×. Holes too close to bend lines or part edges create thin die sections that crack under load; keep hole edges at least 2.5× material thickness from bend tangents, and give punches adequate support steel. Every hole that survives 100,000 hits without maintenance is a hole that did not add hidden tooling cost.
4. Spend Tolerance Where It Functions—Loosen Everything Else
Tight tolerances make parts more expensive to inspect and more likely to fail inspection, without necessarily improving function. General commercial stamping tolerances run around ±0.010 inch up to 6 inches and ±0.015 inch up to 12 inches. A bracket with 15 dimensions at ±0.005 inch can take roughly 8 minutes per piece to verify with CMM; loosening functionally non-critical dimensions to ±0.010 inch drops inspection to about 3 minutes with attribute gauging—on a 5,000-piece lot, that is 417 hours versus 250 hours, or $7,515 in inspection labor alone at $45/hour. Tolerance mapping—separating functional dimensions from reference dimensions before tooling begins—prevents over-specification from inflating both die precision and inspection cost.
5. Match Die Complexity to Real Volume, Not Worst-Case Assumptions
Progressive dies that pierce, form, and cut in one stroke cost $25,000–$150,000 depending on station count; compound dies run $10,000–$40,000; single-operation dies start around $3,000. A design with 12 holes, 3 bends, and 2 embossments may need 18–20 stations; trimming that to 4 holes and 2 bends can cut 6 weeks of die-build time and roughly $30,000 in die cost. Equally important: do not build a die for 500,000 parts when expected volume is 50,000. Designing to the actual production life—using vendor engineering data to confirm tool steel and component longevity—avoids overdesign that silently drains tooling budget.
6. Standardize Die Components and Modularize Where Volume Is Uncertain
Standardization is one of the most underused cost levers in die making. High-standardization tooling systems use 60–70% standard parts and can reduce manufacturing costs by up to 50% compared with conventional progressive dies; in some short-run applications, customizable modular tooling has delivered up to 85% reduction versus conventional methods. Standard die sets, plates, and purchased components move cost from custom machining to catalog pricing and shorten lead time because frames are available from stock. For programs with design-change risk or high-mix/low-volume profiles, modular die inserts isolate wear and revision to the active section—a hole change or bend adjustment becomes an insert replacement rather than a full-die rework.
The common thread across all six strategies is timing. DFM decisions made during design cost almost nothing to change; the same changes after die build carry multipliers that escalate from 2–4× after drawline sign-off to 8–15× during production. A 20-minute manufacturability review before dimensions are locked routinely identifies the two or three features driving most of the tooling quote. Simulation and forming analysis further reduce the need for physical tryout iterations, with studies reporting tooling cost reductions in the 16–24% range when CAE is used early.
At Shenzhen Hony Tai, DFM review is built into the quoting process for customized metal stamping, deep drawing, and sheet metal fabrication programs. If you have a drawing or a concept and want to know which design choices are inflating your tooling quote—and what can be changed before steel is cut—send the part data and annual volume. The most useful cost-reduction conversation happens before the die exists.